







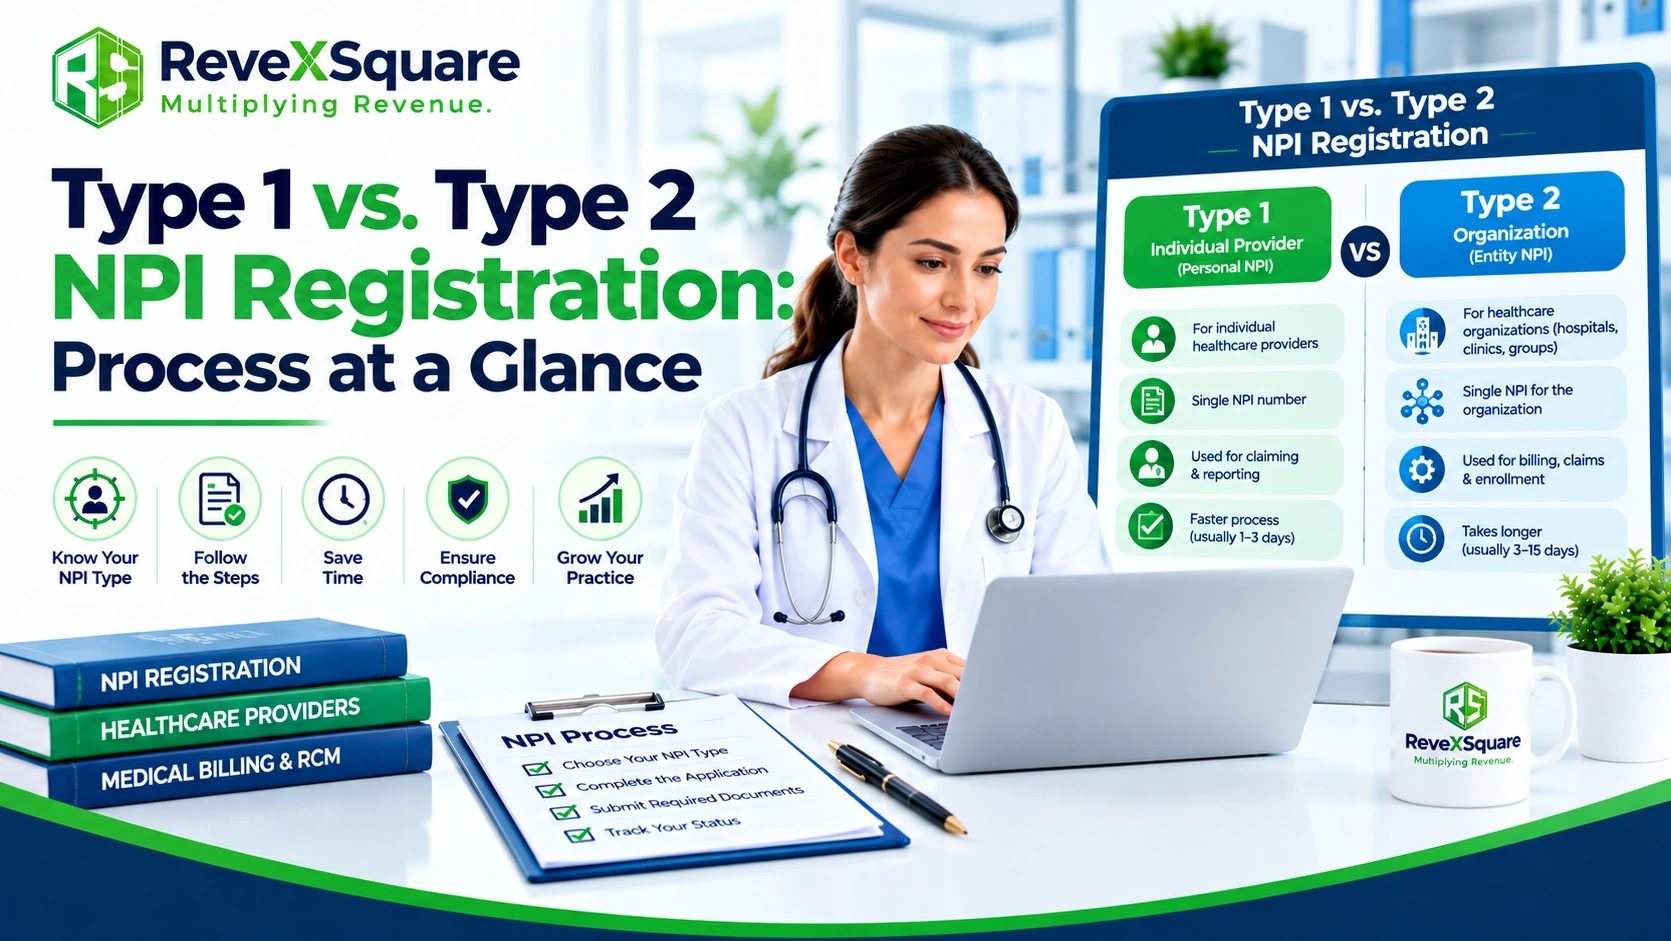
Healthcare providers and organizations in the United States need a National Provider Identifier (NPI) before they can handle insurance claims and medical billing. The NPI registration process depends on who is applying. An individual provider applies for a Type 1 NPI. A healthcare organization applies for a Type 2 NPI.
Here’s a step-by-step look at NPI registration. It explains what Type 1 and Type 2 applicants each need, how to apply on the National Plan and Provider Enumeration System (NPPES), what to gather before you begin, and what to expect once you’ve applied. If you’re signing up as an individual or getting an NPI for a medical practice, you’ll know how the process works and which mistakes to watch for.
Understanding Type 1 and Type 2 NPI
Before you apply, decide who the applicant is. It’s either an individual healthcare provider or an eligible organizational healthcare provider. Type 1 and Type 2 NPIs identify different kinds of providers, so you can’t swap one for the other.
Picking the right type gives you an accurate provider record. It also supports the setup you’ll need later for billing and payer enrollment.
Type 1 NPI Registration: Individual Healthcare Providers
A Type 1 NPI identifies one individual healthcare provider. It belongs to that person, not just to the practice where they work.
An eligible individual generally keeps the same Type 1 NPI when they change employers, join a group practice, or move to a new location. Those moves may mean updating records or notifying payers. They don’t normally mean getting a new NPI.
Example: A physician moves from one medical group to another and continues to use the same individual NPI as a general rule. The new practice must accurately input the provider’s information into its internal systems and complete any payer enrollment or affiliation steps.
An individual NPI also doesn’t mean the provider is credentialed with an insurance company. Credentialing, enrollment, network participation, and billing eligibility all need separate checks.
Type 2 NPI Registration: Healthcare Organizations
A Type 2 NPI identifies an eligible organizational healthcare provider. Depending on the situation, that could be a medical group, clinic, hospital, or another qualifying healthcare organization.
The organization’s NPI identifies the organization. It isn’t just another number for the physician who owns or runs the business.
“Example: During NPI registration, an eligible medical group obtains its own Type 2 NPI, and each physician in the group has an individual Type 1 NPI. The two kinds of identifiers do different jobs. The claim has to show the provider information the payer and the billing arrangement require.
Some organizational subparts may need their own NPIs, depending on how they’re structured and how they handle certain transactions. Don’t assume every department or location needs a separate NPI. Don’t assume one NPI covers every arrangement either. Read the CMS guidance that fits your structure.
Type 1 vs. Type 2 NPI: Key Differences
Example: A Physician Who Owns a Medical Practice
| Feature | Type 1 NPI | Type 2 NPI |
| Identifies | An individual healthcare provider | An eligible organizational healthcare provider |
| Applicant details | Individual provider information | Organizational information |
| Common example | An individual physician | An eligible medical group |
| Ownership | Associated with the individual provider | Associated with the eligible organization |
| Address change | Generally requires updating the existing record when applicable, not obtaining a new NPI | Generally requires updating the existing record when applicable, not obtaining a new NPI |
| Billing use | Identifies the individual provider where required | Identifies the organization where required |
| Replaces the other type? | No, not when a transaction requires an organizational identifier | No, not when a transaction requires an individual identifier. |
Say a physician runs a medical practice and treats patients personally.
“During NPI Registration, that physician may need a Type 1 NPI for their own identity as a provider.” If the practice qualifies as an organizational healthcare provider, it may need a Type 2 NPI too.
What goes on each claim depends on the payer’s rules and on how the services are provided. The individual NPI doesn’t automatically replace the organizational NPI. The organizational NPI doesn’t automatically replace the physician’s individual NPI.
The practice should check how the provider and the organization have to appear on the claims. It should also confirm that the payer enrollment and affiliation details are in place.
Important: Owning a medical business doesn’t make you eligible for a Type 2 NPI by itself. The applicant has to qualify as an organizational healthcare provider under the rules.
When Both Type 1 and Type 2 NPIs May Be Needed
Yes. If a physician is an individual provider and also runs or works with an eligible organization that needs its own identifier, both types may apply.
The two NPIs don’t identify the same applicant. The Type 1 NPI identifies the individual. The Type 2 NPI identifies the eligible organization.
Example: A physician provides services under their own provider identity while a medical group bills for those services under an organizational arrangement. The practice has to work out which provider fields each transaction and payer requires.
Base the setup on your legal and billing arrangement. Don’t assume every claim has to carry both identifiers in the same way.
Type 1 NPI Registration: Step-by-Step Application Process
An eligible individual healthcare provider follows the Type 1 application process. The official online application is on the National Plan and Provider Enumeration System (NPPES).
Applying for an NPI through the official process is free. A third party may charge for help with the paperwork, but that fee has nothing to do with the official application.
First, check whether you already have an NPI. Providers generally keep the same identifier for their whole career, so a job change or a new practice location usually isn’t a reason to apply again.
Step 1: Confirm That You Need an Individual NPI
Begin by making sure the application is for you as an individual provider.
If you’ve worked at a hospital, clinic, group practice, or another healthcare organization, you may already have an NPI. A former employer may have used your NPI on claims, but that doesn’t mean the employer owns it.
Search the official NPI Registry with your name and any location details you have. Read the record that comes back before you decide to apply.
If a record looks like yours, verify the details. A similar name isn’t enough. Check the identifying information, and contact NPPES support if you can’t tell whether the record is yours.
If you already have an NPI, look at whether the record needs an update instead of filing a new application.
Step 2: Prepare Your Individual Information
Gather what the current NPPES application asks for before you start. Having it ready makes the process easier and helps you avoid incomplete or inconsistent entries.
Depending on your situation, the application may ask for:
- Your legal name and other identifying details
- Date of birth and the individual identifier the application requests
- Mailing address
- Practice location information, where applicable
- Contact details
- Provider taxonomy classification
- Professional license information, where applicable
- Other names or practices detail the application requests
Use the current official instructions to see which fields apply to you. An old application checklist is no substitute for the live instructions.
Keep your own details separate from your employer’s. If you work at a clinic, the clinic’s business name doesn’t become your individual provider name.
Look closely at the contact information you give, too. It should support communication about the application and your record. If the application has different address or contact types, follow its instructions. Don’t assume one field covers every purpose.
Step 3: Access the Official NPPES Website
Open the official NPPES website and follow the current account access instructions.
NPPES uses the CMS identity and access management process. The steps depend on whether you’re creating an account, signing in to an existing one, or using an authorized representative.
Make sure you’re on the official site. Don’t enter sensitive information on a third-party site that claims to be the official NPI portal.
If you’re applying yourself, use the right account and give accurate information. If an authorized person is helping you, follow the access and authorization requirements. Don’t casually share your login credentials, and don’t give anyone access that hasn’t been properly authorized.
The goal is to submit through an approved process while keeping control of the provider’s record.
Step 4: Start the Type 1 NPI Application
Once you’re in NPPES, begin a new NPI application and pick the option for an individual healthcare provider.
Read the instructions on each part of the application. The system asks for information that identifies the applicant and keeps the provider record accurate.
Fill in the fields with your individual provider information. If you work for a medical group or hospital, don’t choose an organizational application just because the organization employs you.
The applicant type depends on who is being identified, not where they work. An individual physician and an eligible medical group are different applicants, even when they operate under the same business arrangement.
If you can’t tell whether the application should identify you or an organization, read the official CMS guidance first. The wrong applicant type can cause avoidable headaches later.
Step 5: Select the Appropriate Taxonomy Code
A taxonomy code describes a provider’s classification and specialty. It’s separate from the NPI itself.
Look through the available options and choose the classification that accurately fits your provider type and situation. If the application allows more than one taxonomy code, follow the instructions for entering them and marking the primary one.
Don’t pick a code just because its wording sounds like your specialty. The code should match your provider classification, qualifications, and circumstances.
Taxonomy can matter in billing too. A payer may want classification details that match its enrollment records or claim requirements. A wrong taxonomy entry can cause its own problem even when the NPI is valid.
Example: A physician has a valid NPI but needs to fix the taxonomy information in the provider record. The fix is to confirm the correct classification and update the record. It isn’t to apply for a different NPI.
For taxonomy guidance, use the official CMS healthcare taxonomy resource.
Step 6: Review the Application Before Submission
Before you submit, go through every field and check that it’s accurate and complete.
Pay close attention to:
- Individual provider details
- Mailing and practice addresses
- Contact information
- Taxonomy selection
- License or professional information, where applicable
- Anything else the current application asks for
Correct any errors you can before you submit. A wrong name, address or classification may require a later update or clarification.
Don’t rely on the system to catch a small mistake. Some problems can be caught by automated checks, but you still need to review your submissions.
When everything is right, submit the application and follow the NPPES instructions. Keep any confirmation details and watch your messages in case NPPES asks for more information or corrections.
Step 7: Monitor the Application and Verify the Assigned NPI
Once you’ve submitted, stick to the official instructions and check the application’s status. How long it takes can differ, so don’t count on a set finish date.
When your NPI comes through, search for it in the NPI Registry. Make sure the number is yours and look over the provider details.
Check the NPI type, name, taxonomy, and address in the record. If something is wrong, use the NPPES update process.
Getting the NPI doesn’t finish every task. If you plan to bill insurance, you may still need credentialing, payer enrollment, or other processes. Those steps depend on the payer and on your professional or organizational situation.
Before you submit claims, confirm that the provider’s information is set up correctly in your billing systems and in the payer records.
Type 2 NPI Registration: Step-by-Step Application Process
An eligible organizational healthcare provider uses the Type 2 application process. A Type 1 application identifies an individual. A Type 2 application identifies the organization.
Before you start, decide which legal or organizational entity is applying. Also gather the information NPPES asks for, and identify the person who’s authorized to submit the application for the organization.
The steps below describe the general process. Follow the current official instructions, because the exact fields and requirements depend on the application and the organization’s situation.
Step 1: Confirm That the Applicant Qualifies as an Organization
Start by finding out whether the applicant meets the requirements for a Type 2 NPI.
A business name alone doesn’t make an applicant eligible. The organization has to qualify as an organizational healthcare provider under the rules.
Ask yourself who the applicant really is and how it’s set up. A physician who owns a medical practice may need a Type 1 NPI to identify themselves as an individual. The practice might qualify for a Type 2 NPI too, but that depends on the organization and its situation.
If your organization has multiple locations, departments, or related subparts, look into whether that setup changes its NPI requirements. Some subparts may need identifiers of their own. It depends on their role and on the applicable rules.
Don’t automatically apply for a separate NPI for every office or department. Don’t assume one organizational NPI covers every subpart or billing arrangement, either. When the structure is complex, read the official CMS guidance.
Step 2: Gather the Organization’s Information
Before you open the application, collect the information it requests for the organizational provider.
Depending on the situation and the current application, that may include:
- The organization’s legal name
- Employer Identification Number (EIN), where applicable
- Mailing address
- Practice location information
- Organization contact details
- Organization taxonomy classification
- Information about the authorized official
- Other information NPPES requests
Check the legal name and tax ID against the organization’s official records. If they don’t match, it can cause trouble during the application and again later when you enroll with payers.
Example: A physician owns a practice but applies for a Type 2 NPI for the eligible organization. The application should name the correct organizational applicant. It shouldn’t just put the physician’s individual name where the organization’s legal information is requested.
Check the addresses carefully, too. An organization may have a mailing address and one or more practice locations. Follow the application’s instructions for each type of address.
Step 3: Identify the Authorized Official
The organization has to give the requested information about the person authorized to act for it.
The authorized official needs real authority to submit the application and attest to the information in it. Don’t choose someone just because they handle routine administrative work.
If a billing company, consultant, or other representative helps prepare the application, the organization should follow the NPPES authorization requirements. Help with data entry doesn’t move responsibility for the accuracy of the organization’s information.
Before you submit, confirm the person completing the attestations is authorized to do so. If the organization’s structure or authority is unclear, read the official instructions instead of guessing.
Step 4: Access NPPES and Select the Organizational Application
Go to the official NPPES website and follow the current account access instructions.
Start a new application for an organizational healthcare provider and choose the Type 2 option where it fits.
Read the instructions for each section before you enter anything. The application should identify the organization, not only the individual physician who owns it or works there.
If the organization already has a Type 2 NPI, verify the existing record before you start another application. An existing number may need an update, not a new application.
This quick check helps you avoid duplicate records and keeps the organization’s administrative systems consistent.
Step 5: Enter the Legal and Organizational Details
Fill in the fields requested for the organizational provider.
Review the organization’s legal name, tax identification information, mailing address, practice location information, contact details, taxonomy, and other required fields.
Use the information for the actual applicant. Don’t assume the name patients know, or the one on your website, is the legal name the application wants.
Choose the taxonomy classification that best describes the organization. If more than one is allowed, follow the instructions for marking the primary one and entering any others.
The organization’s taxonomy should describe the organization. Don’t choose it just to match one clinician’s specialty.
If the organization has more than one location or a complex structure, check that the application accurately represents the intended applicant. If you can’t answer a question with confidence, read the official guidance before you submit.
Step 6: Review the Organizational Application
Before you submit, review the whole application, not just the last page.
Confirm the following:
- The correct organization is applying
- The selected NPI type is appropriate
- The legal name matches the organization’s records
- The tax identification information is accurate where requested
- Mailing and practice location details are correct
- The taxonomy classification is appropriate
- The authorized official information is accurate
- Required attestations and other requested information are complete
If the organization has several locations or related entities, make sure the application shows the right applicant and the right structure.
The point of this review is to catch errors before they become part of the NPI record. A mistake may need a later update, and it can add work when the organization sets up billing systems or completes payer enrollment.
Step 7: Submit and Monitor the Application
Send in your completed application, then do what NPPES tells you to do next.
Hold on to any confirmation details. Keep an eye out for requests for more information or corrections, and if NPPES asks you to clarify something, reply the way it instructs.
CMS provides three ways to apply: online, paper, or through an authorized Electronic File Interchange route. The online option is generally the quickest, but the time it takes can still vary. Never promise a firm delivery date unless you have the authority today to do so.
For current methods and instructions, see the official CMS How to Apply page.
Step 8: Verify the Organization’s Assigned NPI
Once the NPI is assigned, look up the organization’s record in the NPI Registry.
Confirm the record identifies the intended organization. Review the NPI type, organization name, taxonomy, and address details.
If anything is wrong, use the NPPES update process. Don’t assume the way to fix an error is to apply for another number.
The organization should check its internal billing records too. Confirm the organizational NPI is entered correctly in the practice management system, the billing platform, and any other system that uses it.
Step 9: Complete Payer Enrollment Separately
An assigned NPI doesn’t enroll an organization with Medicare, Medicaid, or a commercial insurance company.
Example: A medical group gets a Type 2 NPI but still has to complete Medicare enrollment or a commercial payer’s enrollment process. The individual providers tied to the organization may also have to complete enrollment or affiliation requirements.
The organization should look up each payer’s specific requirements. It should also confirm the right provider and organization information is in place before it submits claims.
This matters because a valid NPI can exist even when the payer has no enrollment information for the organization or hasn’t approved the billing arrangement.
For Medicare requirements, see the official CMS Medicare enrollment guidance. Medicaid and commercial payer processes may differ, so confirm them with the program or health plan.

Type 1 vs. Type 2 NPI Registration: Process at a Glance
The application processes share some steps, but the applicant information and authorization requirements differ.
| Registration stage | Type 1 NPI: Individual | Type 2 NPI: Organization |
| Confirm eligibility | Confirm that the application is for an individual healthcare provider | Confirm that the applicant qualifies as an organizational healthcare provider |
| Check existing records | Search for an existing individual NPI | Search for an existing organizational NPI |
| Prepare information | Individual identifying details, contact information and applicable taxonomy details | Legal organization details, tax identification information where applicable, contact details and organizational taxonomy |
| Confirm authority | Follow the applicable account and authorization requirements | Identify an authorized official and follow organizational authorization requirements |
| Complete application | Select the individual provider application | Select the organizational provider application |
| Verify the record | Confirm the assigned NPI and individual provider details | Confirm the assigned NPI and organizational details |
| Before billing | Complete applicable credentialing, payer enrollment and affiliation steps | Complete applicable organizational and individual payer enrollment or affiliation steps |
Additional Type 2 NPI Registration Questions
Can an Organization Apply by Mail?
Yes. CMS 10114 is the paper application and update option, subject to the current instructions. If you go this route, get the current form and follow the official submission requirements.
Some organizations may also be able to use an authorized Electronic File Interchange process. Eligibility and authorization requirements apply.
The online process is generally the most efficient for many applicants, but the right route depends on the organization’s situation. Check the official CMS How to Apply page for current instructions. Don’t rely on outdated forms or third-party summaries.
How Much Does Type 2 NPI Registration Cost?
Applying for an NPI through the official CMS process is free. An organization doesn’t pay a government application fee for a standard NPI.
A third party may charge for help preparing or managing the application. That’s a separate service fee, not a CMS registration fee.
Before you pay for help, find out what the service includes and whether your organization can complete the official application itself.
How Long Does NPI Registration Take?
Processing time varies. CMS calls the online application the most efficient route, but the time an application takes can’t be assumed to be the same every time.
Incomplete information, requests for clarification, or other application problems can slow things down. Applicants should give accurate details, keep an eye on the application, and answer any requests by following the official instructions.
If your practice has a time-sensitive payer enrollment or provider onboarding deadline, plan for the NPI application and the enrollment steps that follow as separate pieces. Getting an NPI doesn’t mean every payer requirement is done.
NPI-Related Billing Support from Revex Square
Getting the right National Provider Identifier (NPI) is an important step. But accurate provider records also have to be kept up across billing systems and payer enrollment records. Mismatches between individual and organizational information, outdated details, and unfinished payer enrollment can all cause avoidable administrative trouble.
Revex Square supports healthcare organizations with medical billing, denial management, accounts receivable, and related revenue cycle services. Our team can help practices review NPI-related billing issues, look into provider information discrepancies, and work on problems that affect claim processing.
If your practice is dealing with billing delays or repeat claim issues tied to provider identifiers, contact Revex Square. We can talk through your current process and find where more billing support could help.
Explore our services:
Contact Revex Square to talk about your medical billing challenges and improve the accuracy of your provider information and billing workflows.
Conclusion
The first step in deciding between a Type 1 NPI and a Type 2 NPI is knowing who the applicant is. Type 1: identifies a single health care provider. Type 2 means an eligible organizational health care provider. Depending on the structure of the medical practice and billing arrangements, both may be needed.
Before applying, check to see if the NPI you need already exists. Get the right application information and the correct way to follow the NPPES process. Validate the record and complete any additional credentialing, payer enrollment or affiliation requirements once the NPI is assigned.
A correct NPI set-up is just one part of a sound billing process. Accurate provider records and knowledge of payer requirements can help practices avoid preventable issues and bill more consistently.
Frequently Asked Questions About Type 1 and Type 2 NPI
Can a practice have both a Type 1 and a Type 2 NPI?
Yes, when the situation calls for both. An individual provider may have a Type 1 NPI, and an eligible organization tied to that provider may have a Type 2 NPI. Each identifier represents a different provider. How you use them depends on the claim and the billing arrangement.
How long does it take to get an NPI?
Processing times vary. CMS calls the online application the most efficient route, but don’t assume a fixed processing time. Submit accurate information, monitor the application, and respond to requests for clarification. Payer enrollment may take extra time after the NPI is assigned.
What is the difference between Type 1 and Type 2 NPI?
A Type 1 NPI identifies an individual healthcare provider. A Type 2 NPI identifies an eligible organizational healthcare provider. A practice may need both, depending on its structure and billing arrangements. The two types identify different applicants, so don’t use them interchangeably when a transaction calls for a specific provider identifier.
Is NPI registration free?
Yes. Applying through the official CMS NPI process is free. Third-party companies may charge for help with the application, but those are service fees, not government NPI registration fees.
Does receiving an NPI automatically enroll a provider with insurance companies?
No. An NPI doesn’t complete Medicare, Medicaid, or commercial payer enrollment. Providers and organizations have to check the enrollment, credentialing, and affiliation requirements separately.
Does a physician need a new Type 1 NPI after changing employers?
Generally, no. An individual provider normally keeps the same Type 1 NPI when changing employers or practice locations. The provider may need to update some information and complete the payer enrollment or affiliation steps.
Can a healthcare organization apply for a Type 2 NPI online?
Yes. Eligible organizations can generally apply through the official NPPES online process. CMS also offers other application routes, subject to current instructions and requirements.
Can an organization use its Type 2 NPI instead of a physician’s Type 1 NPI?
Not when the transaction needs the individual provider’s identifier. The organization and the physician are different providers. The billing and rendering provider information on a claim depends on the payer’s rules and the billing arrangement.
Does updating NPPES automatically update insurance payer records?
No. Don’t assume an NPPES update reaches every payer’s records on its own. Providers and organizations should review each payer’s requirements and send updates or enrollment changes separately where needed.
| # | Current subheading | New subheading |
| 1 | Understanding Type 1 and Type 2 NPI | How Type 1 and Type 2 NPIs Differ Before You Apply |
| 2 | Type 1 NPI: Individual Healthcare Providers | Type 1 NPI for Individual Healthcare Providers |
| 3 | Type 2 NPI: Healthcare Organizations | Type 2 NPI for Healthcare Organizations |
| 4 | Type 1 vs. Type 2 NPI: Key Differences | Comparing Type 1 and Type 2 NPI Features |
| 5 | Example: A Physician Who Owns a Medical Practice | When a Physician Owns the Practice |
| 6 | When Both Type 1 and Type 2 NPIs May Be Needed | Situations Where You May Need Both NPIs |
| 7 | Type 1 NPI Registration: Step-by-Step Application Process | How to Register for a Type 1 NPI, Step by Step |
| 8 | Step 1: Confirm That You Need an Individual NPI | Step 1: Check Whether You Already Have an Individual NPI |
| 9 | Step 2: Prepare Your Individual Information | Step 2: Gather Your Personal and Professional Details |
| 10 | Step 3: Access the Official NPPES Website | Step 3: Sign In Through the Official NPPES Portal |
| 11 | Step 4: Start the Type 1 NPI Application | Step 4: Begin the Individual NPI Application |
| 12 | Step 5: Select the Appropriate Taxonomy Code | Step 5: Choose the Right Taxonomy Code |
| 13 | Step 6: Review the Application Before Submission | Step 6: Go Over Every Field Before You Submit |
| 14 | Step 7: Monitor the Application and Verify the Assigned NPI | Step 7: Track Your Application and Confirm the New NPI |
| 15 | Type 2 NPI Registration: Step-by-Step Application Process | How to Register for a Type 2 NPI, Step by Step |
| 16 | Step 1: Confirm That the Applicant Qualifies as an Organization | Step 1: Make Sure Your Organization Is Eligible |
| 17 | Step 2: Gather the Organization’s Information | Step 2: Collect Your Organization’s Details |
| 18 | Step 3: Identify the Authorized Official | Step 3: Name the Authorized Official |
| 19 | Step 4: Access NPPES and Select the Organizational Application | Step 4: Open NPPES and Choose the Organizational Application |
| 20 | Step 5: Enter the Legal and Organizational Details | Step 5: Enter the Legal Name, Address, and Taxonomy |
| 21 | Step 6: Review the Organizational Application | Step 6: Check the Application Before It Goes In |
| 22 | Step 7: Submit and Monitor the Application | Step 7: Submit the Application and Watch for Updates |
| 23 | Step 8: Verify the Organization’s Assigned NPI | Step 8: Confirm the NPI Record Is Correct |
| 24 | Step 9: Complete Payer Enrollment Separately | Step 9: Handle Payer Enrollment as a Separate Task |
| 25 | Type 1 vs. Type 2 NPI Registration: Process at a Glance | Registration Process Compared: Type 1 and Type 2 |
| 26 | Additional Type 2 NPI Registration Questions | More Questions About Type 2 NPI Registration |
| 27 | Can an Organization Apply by Mail? | Can an Organization Submit the Application by Mail? |
| 28 | How Much Does Type 2 NPI Registration Cost? | What Does Type 2 NPI Registration Cost? |
| 29 | How Long Does NPI Registration Take? | How Long Does the NPI Registration Process Take? |
| 30 | NPI-Related Billing Support from Revex Square | NPI Billing Support from Revex Square |
| 31 | Conclusion | Final Thoughts on Type 1 and Type 2 NPI |